Skip to content
Details

Custom Insert Boxes

Electronics inserts planned around component movement, cavity depth, packing order and the different jobs performed by paperboard, corrugated and foam interiors.

Map Every Component Before the Box

Custom Insert Boxes work best when the interior is planned from the complete electronics kit rather than from the main device alone.

A phone, controller, sensor, charger or other electronic product may establish the primary footprint, but the finished pack can also contain power adapters, cables, batteries, manuals, mounts, tools and small accessories. Those pieces compete for depth, access and structural support.

Draw the component map first.

For each item, record:

  • length, width and height in its packed state
  • weight
  • surfaces that can safely contact the insert
  • features that need clearance
  • required orientation
  • whether it must remain separated from another component
  • how a packer places it into the box
  • how the customer removes it

That map determines the inside architecture more reliably than choosing an outer box and filling whatever space remains.

In electronics and gadget packaging, inserts become most valuable when several components need distinct positions, separation and removal paths rather than one open cavity.

The insert should answer where every part goes before artwork, finishes or exterior dimensions make those positions harder to change.

Control More Than Sideways Movement

An insert is not finished because the product no longer slides left and right.

Electronics components can move vertically, rotate inside a loose cavity, collide with neighboring parts or rise out of shallow compartments when the box changes orientation.

Each movement needs its own restraint.

Stop Sliding

Sidewalls, folded rails, shaped cavities and dividers can locate the product laterally.

The cavity should keep the component centered without forcing pressure into buttons, connectors, screens or other sensitive features.

Stop Lift

A component may fit tightly around its perimeter and still jump upward when the package is turned.

Cavity depth, retaining tabs, upper decks or the closed-box geometry can help control vertical movement, but the lid should not simply crush the product into place.

Stop Rotation

Irregular components can pivot even when their maximum dimensions fit closely.

A charger with one narrow end, a controller with projecting grips or a round accessory may need contact at more than two opposing points to keep its orientation predictable.

Stop Component-to-Component Contact

Two items should not share open space merely because both physically fit there.

A hard power adapter can damage a finished device surface. A loose cable plug can strike a screen. Batteries and tools can load a partition differently from lightweight manuals.

Separation is part of retention.

Cavity Depth Changes the Fit

Two cavities with the same outline can behave very differently if their depths are different.

A shallow cavity may leave enough of the product exposed for easy removal but allow the component to rise during handling. A deep cavity can increase edge restraint but make the product difficult to grip.

The right depth depends on product height, weight, contact surfaces and the intended removal method.

Finger access should be designed into the cavity rather than added after the first sample proves too tight.

A notch, side relief or exposed product edge can create removal access without opening the entire cavity. The best location is usually beside a surface strong enough to grip.

Do not place finger access where the customer is encouraged to pull on:

  • a cable
  • a button
  • a connector
  • a lens
  • a screen edge
  • an antenna
  • another delicate projection

For products whose dimensions and fragile areas should drive the complete package, custom product packaging can align the outer structure with the insert instead of sizing them independently.

Dense Parts Need Their Own Bearing Surface

Electronics kits often mix light and heavy components inside one footprint.

A cable weighs very little compared with a power adapter. Printed instructions carry almost no structural load. A charger, battery or metal accessory can place substantial force onto the insert when the box is turned.

That difference matters.

A light paperboard partition that works well for separating cables may deform if a dense adapter repeatedly loads it from the side. One insert does not need identical construction around every component.

The heavier item can sit over a reinforced fold, corrugated cell or deeper structural support while lightweight pieces occupy simpler compartments.

One Flat Platform Can Hide a Weak Point

Consider a device and power adapter presented side by side on one folded paperboard platform.

Both cavities fit correctly when the box sits flat. The adapter, however, is much heavier than the device. When the pack travels on its edge, the adapter loads the partition between the two cavities.

If that partition bends, the adapter can move toward the device even though both cutouts were dimensionally correct.

The better adjustment is to give the adapter an independent bearing structure or move it into a lower compartment where its mass is carried by stronger folds.

The improvement comes from changing how the load enters the insert, not from making every cavity tighter.

Packing Order Belongs in the Dieline

A technically accurate insert can still create a poor production workflow if components have to be loaded in the wrong sequence.

The dieline should reflect how the box will actually be packed.

If a cable must go underneath a device, packers need to place it before the device. If a charger compartment becomes inaccessible after an upper tray is installed, that tray cannot be loaded first. If the main product has to be removed again to correct a cable position, packout becomes slower and less consistent.

A clean sequence might be:

  1. erect or place the insert
  2. load the dense accessory
  3. route the cable
  4. place the main device
  5. add smaller accessories
  6. insert literature
  7. close the package

Another electronics kit may require a completely different order.

The point is not to force one standard sequence. It is to make sure the structure does not fight the actual packing process.

An insert should make the correct packout easier than the incorrect one.

Different Movements Need Different Constructions

Paperboard, corrugated board and foam can all work inside electronics packaging, but they solve different mechanical problems.

Paperboard for Position and Presentation

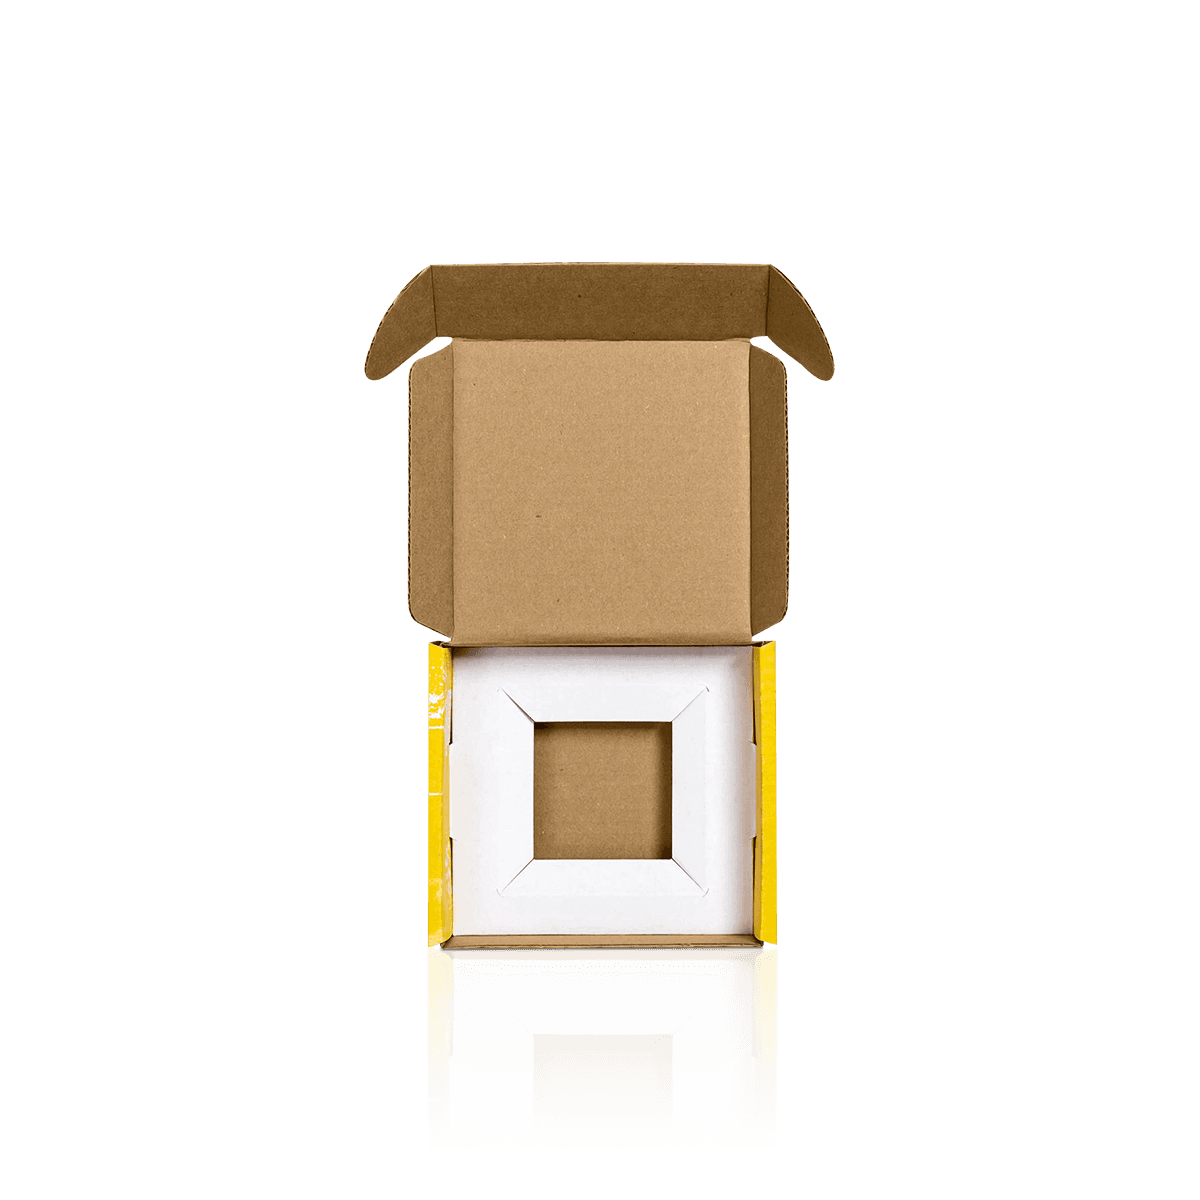
Die-cut and folded paperboard can create platforms, side rails, pockets, tabs and multi-cavity layouts for lighter devices and accessories.

It works especially well when the insert remains visible during opening because the surface can integrate closely with the outer graphics.

Paperboard is strongest when the main job is controlled placement rather than substantial impact cushioning.

Corrugated for Cells and Load Support

Corrugated fitments can create deeper cells, stronger partitions and more structural support around heavier components.

A corrugated cradle may be appropriate when a device or accessory loads the insert more aggressively than light paperboard should carry.

It can also work inside an outer shipping structure where transit protection matters more than a seamless presentation surface.

Foam for Cushioning and Close Nesting

Foam becomes more relevant when impact isolation, scratch-sensitive surfaces or irregular shapes need closer nesting.

Paperboard, corrugated and foam can all organize an electronics kit. Protective foam insert boxes are the stronger fit when cushioning and close foam cavities carry the main protective job.

The trade-offs among foam, cardboard and molded pulp inserts become clearer once the required movement control and cushioning level are known.

Design the Insert and Outer Box Together

An insert consumes internal space.

Its sidewalls, folds, cavities, foam thickness or corrugated cells all reduce the room left inside the outer package. Designing the box first and dropping an insert into the remaining cavity can create unnecessary compromises.

The insert and outer structure should be dimensioned as one system.

That means accounting for:

  • outer-box wall thickness
  • insert sidewalls
  • material thickness
  • cavity depth
  • upper and lower clearance
  • finger access
  • accessory layers
  • lid or closure movement

A small dimensional change inside the insert can affect the box footprint or depth.

This is particularly important when a device sits close to the lid. Adding a printed card, cable envelope or protective sheet later can push the complete vertical stack beyond the original clearance.

Free design and dieline support can help coordinate these relationships before tooling and artwork are finalized.

The Outer Structure Changes the Insert Job

The same electronic kit can use different insert architecture depending on the box around it.

A permanent rigid structure gives the insert fixed internal walls and consistent registration points. Rigid setup boxes suit premium electronics when that formed geometry and substantial presentation are part of the pack.

A lighter retail pack can use folding cartons for electronics when the product weight and insert system suit paperboard construction.

For parcel or distribution duty, shipping boxes can carry external handling loads while the internal fitment controls the device and accessories.

The insert should therefore be evaluated with its actual outer box.

A strong insert inside a weak shell can still fail. A heavy outer carton with a loose interior can still let components collide.

Change the Insert Before Enlarging Every Box

Multi-SKU electronics programs often reach a point where one outer package almost works for several products.

The instinct may be to enlarge the box until every model fits.

That can create unnecessary empty space around the smaller configurations.

A better question is whether the outer footprint can stay common while the insert changes.

For example, several device variants may share the same outer box while using:

  • different cavity widths
  • different accessory compartments
  • different platform heights
  • model-specific retention tabs
  • separate charger layouts

This approach can simplify the visible packaging system without pretending unlike products have identical internal geometry.

It is particularly effective when model dimensions remain reasonably close but accessory sets change.

The insert becomes the adaptation layer between a consistent outer pack and different electronics configurations.

Visible Inserts Are Part of the Graphics

An insert that remains visible after opening becomes part of the brand presentation.

Paperboard platforms can carry color, patterns or short printed cues. A contrasting insert can frame the device. A restrained interior can place more visual emphasis on the product itself.

Print should still respect the structural work.

Do not place important artwork across folds, locking tabs or areas hidden by the product. If a cavity edge needs tight manufacturing tolerance, decorative elements should not make small positional variation look larger than it is.

For branded packs where exterior and interior printing need to work together, custom printed boxes can coordinate the visual system across the box and insert.

Premium offset printing can support fine typography, solid colors and high-detail interior artwork where the insert material is suitable for printing.

The product should remain easier to understand because of the interior graphics, not harder to remove because appearance took priority over structure.

Validate Each Risk Where It Occurs

Custom insert testing should answer a specific question rather than becoming one final generic approval stage.

Check cavity fit when product dimensions are established.

Check dense-component support when load-bearing partitions are designed.

Check cable routing during packout.

Check the complete vertical stack after literature and accessory layers are added.

Check shipping movement using the finished outer structure and the complete loaded kit.

The principles behind reducing shipping damage through structure and fit matter when the insert is responsible for stopping one component from gaining momentum inside another box.

Free sample examples of previous work can help assess material and print quality. A paid fully custom pre-production sample is more appropriate when the exact product cavity, removal access or loaded interior needs physical confirmation.

This keeps sampling tied to the decision it is supposed to validate rather than treating one prototype as proof of every possible use condition.

Keep Small Parts Accountable

The smallest electronics components are often the easiest to lose during packing or unboxing.

Adapters, memory cards, SIM tools, screws, connectors and short cables can disappear underneath larger parts if they do not have obvious positions.

A cavity does not always need to match the exact silhouette of every tiny item.

A shallow pocket, labeled compartment or compact accessory envelope can sometimes control small parts more effectively than several deep cutouts.

The key is accountability.

A packer should be able to look at the completed insert and confirm whether all required components are present. The customer should also be able to see where small pieces belong after opening.

That matters for kits used in enterprise deployment, service work or repeated setup because packaging can support component checks as well as presentation.

One Interior Should Communicate the Kit

A strong electronics insert does more than stop movement. It makes the product set immediately understandable.

The main device should be visually dominant. The charger should have a clear position. Cables should be restrained rather than tangled. Setup materials should appear where they make sense in the first-use sequence. Small components should not be hidden under larger ones without a reason.

That hierarchy can be built through cavity size, depth and placement rather than decorative complexity.

An MOQ starting from 100 boxes makes smaller kit-specific interiors practical when one layout cannot serve every configuration cleanly. Warehousing and scheduled deliveries can also support programs where different device bundles replenish on different schedules.

The strongest Custom Insert Boxes make the contents obvious before the customer touches anything: every component has a deliberate position, every dense part has structural support and every cavity has a reason to exist.

FAQs

It depends on what the pack needs to do. Paperboard works well for lighter accessories, foam suits fragile or scratch-prone items and molded pulp can be a strong option when structure and recyclability both matter.

They make more sense when the product includes several parts that need exact placement. Folding Cartons for Electronics work well for simpler packs, while insert-led boxes are better for organized kits, premium device sets and bundles with multiple accessories.

Yes. When every item has a defined position, packers spend less time adjusting placement, checking orientation or adding extra filler to stabilize the contents.

No. They are also useful for replacement-part kits, onboarding bundles, subscription packs and retail sets where organization matters more than luxury styling.

Very little in most cases. The goal is secure retention without forcing the item in or making removal awkward, so fit testing should match the product shape, weight and handling needs.

Process

How it works

Your Packaging Journey, From Idea to Production and Delivery

01

Tell Us Your Specs

Custom packaging boxes

Tell Us Your Specs

Provide size, quantity, printing, and finishes.

02

Get a Fast Quote

Custom packaging boxes

Get a Fast Quote

Instant transparent pricing, no hidden fees.

03

Design and Approval

Custom packaging boxes

Design and Approval

Artwork checks, revisions, and final sign-off.

04

Produce

Custom packaging boxes

Produce

Expert manufacturing to meet deadlines.

05

Ship to Your Door

Custom packaging boxes

Ship to Your Door

Hassle-free, flexible delivery options.

Get Your Quote for Custom Insert Boxes

Share your product details, size, quantity and artwork needs. We’ll help choose the right packaging style and send a clear quote.