Custom tuck boxes may cost from about $0.14 to more than $4 per box. The final price depends mainly on quantity, box dimensions, paperboard thickness, printing, finishes and the type of tuck-box structure.
A simple paperboard carton ordered in bulk will usually sit near the lower end. A short run with thicker stock, interior printing, foil, embossing or a glued bottom will cost more.
A custom tuck box is a folding carton that closes with one or more tuck flaps. It is usually supplied flat, then erected during packing, so the structure, board and assembly method all affect total cost.
For practical budgeting, these are realistic estimated ranges:
These are planning estimates rather than fixed prices. A final quote requires the exact size, material, quantity, artwork and structural details.
The most important point is simple: the cheapest unit price does not always create the lowest overall packaging cost. A weak carton, oversized structure or slow-to-assemble box can cost more elsewhere in the operation.

At Custom Packly, we look at the box, the product and the packing process together. That makes it easier to find savings without weakening the packaging or making it look cheaper.
Why Does Quantity Change the Price So Much?
Higher quantities usually reduce the price per box because setup costs are spread across more units.
A tuck-box order may require:
Many of these steps are required whether the order contains 100 boxes or 10,000. On a run of 100, each box carries a larger share of the setup cost. On a run of 10,000, that cost is spread much more widely.
This is why increasing the quantity can create a bigger saving than removing a small visual finish.
However, a lower unit price does not automatically make a larger order the right choice. The total investment will still be higher and unused boxes can become waste if the product size, branding or legal information changes.
My approach is to separate new products from established products.
For a new launch, a smaller run may be sensible while the fit, artwork and demand are still being tested. Once the product is stable, a larger order can reduce cost and make repeat production easier.
Custom printed box costs also shift with quantity because the same setup work is spread across more units.
The Six Biggest Factors That Affect Tuck-Box Cost
The final price of a custom tuck box is normally shaped by six connected decisions: quantity, dimensions, board, print coverage, finishes and structure.
Changing one specification may affect several others. A larger box uses more board. A heavier product may require thicker stock. Thicker stock may need different creasing and a stronger bottom.
That is why an accurate quote starts with the product rather than the artwork.

1. Order Quantity
Low quantities usually have the highest price per unit.
If a product sells consistently, ordering 3,000, 5,000 or 10,000 boxes may be far more economical than placing repeated orders for 300 or 500.
The right quantity should be based on:
Ordering too few boxes can be expensive. Ordering far more than you can use can be equally costly.
The best quantity is usually the largest volume you can use confidently before the artwork or product changes.
2. Custom Dimensions
Box dimensions influence both material usage and production efficiency.
An oversized tuck box uses more paperboard than necessary. It can also create a larger flat dieline that fits less efficiently on the printing sheet.
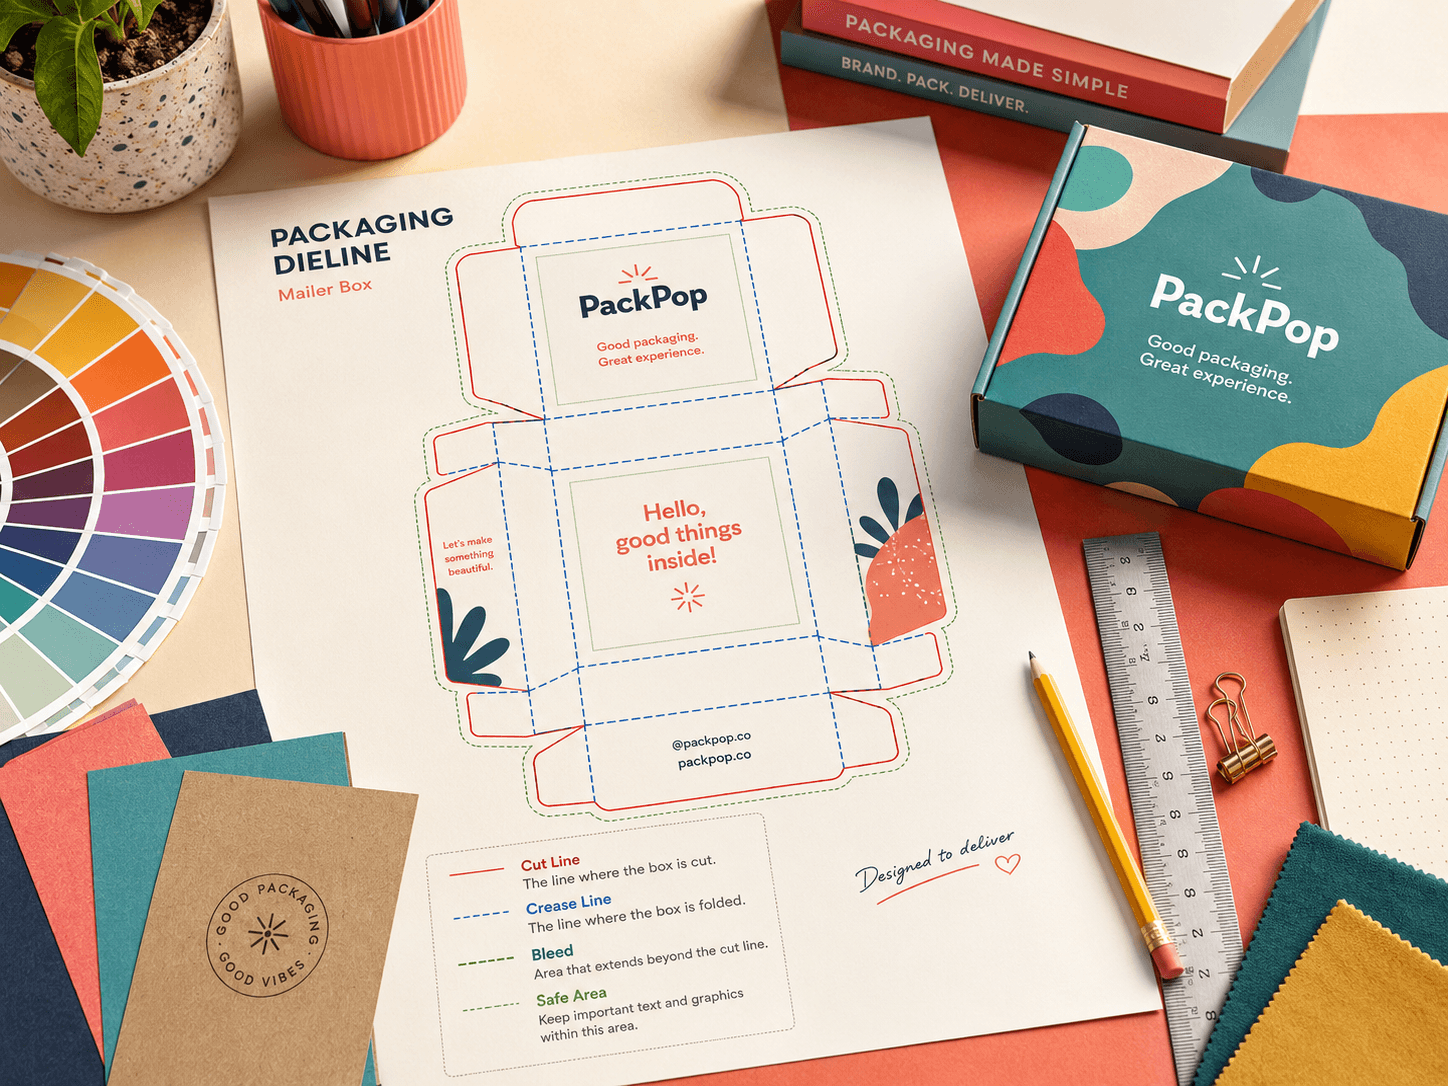
This matters because tuck boxes are produced flat. The manufacturer tries to arrange multiple dielines across a larger sheet with as little unused space as possible. This arrangement is known as nesting.
A small adjustment to the length, width or depth can sometimes allow more boxes to fit on each sheet. In other cases, a minor increase can push the dieline into a less efficient layout and raise the price.
The right size should provide enough room for:
It should not include empty space with no structural purpose.
You can use the free custom dieline generator to test dimensions and understand how the flat structure relates to the finished carton.
3. Paperboard Type and Thickness
Thicker paperboard generally costs more because it uses more material and may require more demanding production settings.
However, the cheapest board is not automatically the best value.
A lightweight supplement carton has very different structural needs from a glass jar, candle or compact electronic product. Using board that is too thin can cause:
Using board that is far thicker than necessary can add cost without improving performance.
When comparing quotes, ask whether each supplier has priced the same:
A lower quote based on lighter paperboard is not a genuine like-for-like saving.
Paperboard, kraft, corrugated and rigid board differ in strength, print surface and typical use, so material names on two quotes should be checked carefully.
4. Printing and Ink Coverage
A simple outside print is normally less expensive than heavy print coverage on both sides of the board.
The printing cost may change based on:
Full-color printing is common for custom tuck boxes and does not always create a dramatic price increase, particularly at efficient production volumes.
Interior printing often adds more because it creates another printed surface and may require extra handling or a different production sequence.
The value of interior printing depends on whether the inside of the carton has a clear role. It may be worth paying for when it displays instructions, a thank-you message, a brand story or part of the unboxing experience.
5. Specialty Embellishments
Foil stamping, embossing, debossing, spot UV and specialty coatings can all increase the cost.
These finishes often require separate setup, tooling or production passes. The price may depend on the size of the finished area, the artwork complexity and the number of locations where the effect is applied.
Premium does not mean applying every finish available.
In my experience, one controlled feature often looks better than several competing effects. A small foil logo or selective spot UV can create a stronger focal point than covering every panel with decoration.
Matte, gloss, spot UV, foil and embossing change both the visual result and the production steps, so finish decisions should be settled before final artwork.
6. Box Structure
The structure changes how much material is used, how efficiently the dieline nests, how many areas need glue and how long the box takes to assemble.
A basic reverse tuck carton will usually cost less to manufacture than a pre-glued auto-bottom box.
However, the basic carton may require more manual packing time. When thousands of boxes are being filled, assembly labor can become more important than a small difference in manufacturing price.
The best structure should be chosen by comparing:
How Tuck-Box Structure Affects Price
Tuck-box structure affects cost in three main ways: material nesting, assembly labor and gluing requirements.

Material Nesting
Nesting refers to how efficiently flat box dielines fit across a printing sheet.
Some flap layouts allow cartons to sit closely together with less unused board. Others require more space between each shape.
Efficient nesting can reduce material waste and improve production yield. However, the exact result depends on the finished box dimensions and sheet size. A reverse tuck box is often efficient, but no structure is automatically the cheapest at every size.
Assembly Labor
Some cartons arrive flat and require several manual folds before the product can be inserted.
Others are pre-glued and open into shape with one movement.
A box that costs slightly more to manufacture may save money during packing if it allows staff to assemble hundreds or thousands of units more quickly.
This is particularly important for:
Gluing Requirements
A basic tuck carton normally needs one glued side seam.
Auto-bottom boxes require additional factory gluing to create the pre-assembled base. More glue areas, more folding steps and more production control usually increase the unit price.
Glue can reduce labor later, but it adds labor during manufacturing.
This is why structure should be judged by the complete packing process rather than production price alone.
Reverse Tuck End Boxes: Usually the Most Economical
Reverse tuck end boxes have top and bottom closure flaps that fold in opposite directions.
They are often one of the lowest-cost tuck-box options because the alternating flaps may support efficient sheet nesting. The structure is also straightforward to produce and does not require a complex base.
Reverse tuck end boxes work well for:
I usually recommend reverse tuck end when the product is light and cost efficiency matters more than maintaining an uninterrupted front panel.
It is a practical structure, but it is not always the best choice for premium shelf presentation or heavier items.
Straight Tuck End Boxes: Better for a Clean Front Panel
Straight tuck end boxes have top and bottom flaps that fold in the same direction, usually toward the back.
The structure often costs slightly more than a comparable reverse tuck carton, depending on size and sheet layout. Its main advantage is visual presentation.
Because both closures sit toward the same side, the main display panel can remain cleaner. This gives product photography, logos and front-facing information more room to work.
Custom straight tuck end boxes are well suited to:
I would choose a straight tuck end box when the packaging has to perform on a shelf and the front panel is an important part of the sale.
The extra cost is often justified when presentation matters more than securing the absolute lowest structural price.
Tuck Top Auto Bottom Boxes: Higher Cost but Faster Packing
A tuck top auto bottom box, also known as a crash-lock box, has a pre-glued base that opens and locks into place when the carton is erected.
This structure normally costs more because the bottom must be folded and glued during manufacturing.
Its advantage appears later in the process. The packer can open the carton quickly without manually folding several bottom flaps.
Auto-bottom boxes are often suitable for:
For a small order packed occasionally, the added cost may not be necessary.
For a large order packed by hand, the time saved on every carton may outweigh the higher box price.
That is why I do not judge an auto-bottom structure by the manufacturing quote alone. I also consider how many boxes will be packed and how much labor the structure may save.
Snap-Lock Bottom Boxes: Strong Without a Pre-Glued Base
Snap-lock bottom boxes use four interlocking flaps to create a stronger base.
They normally cost more than a standard tuck carton but may cost less than a fully glued auto-bottom box. They provide better support without requiring the manufacturer to pre-glue the complete base.
Snap-lock bottoms are useful for:
The tradeoff is assembly time. The bottom flaps must be folded into the correct sequence by hand.
This structure makes sense when strength matters but packing speed is not the main concern.
Different custom box structures can make more sense when a basic tuck closure is not strong enough.
A New York Client Reduced the Cost Per Box by About 50%
One of the clearest cost-saving examples I have seen involved a client in New York.
The company was using a tuck box that was larger than the product required. It was also ordering only 3,000 boxes at a time.
Both decisions were raising the price.
The oversized box used more paperboard and created unnecessary empty space. The smaller quantity also meant setup costs were spread across fewer units.
We made two changes:
The cost per box fell by about 50%.
The saving did not come from switching to weak board, removing useful print or making the package look cheaper. It came from eliminating wasted size and moving to a more efficient production volume.
This is the kind of cost reduction I prefer.
My rule is to remove waste before removing value.
Before cutting board quality or deleting a finish that supports the brand, check whether the box is too large, the quantity is too low or the structure is inefficient.
Which Upgrades Are Worth Paying For?
The best upgrades improve fit, presentation or customer experience without adding unnecessary production steps.
In my experience, structural right-sizing, selective spot UV and purposeful interior printing can justify their cost.

Structural Right-Sizing
Right-sizing is often the most valuable upgrade because it can improve the packaging and reduce waste at the same time.
An accurately sized box can provide:
A generic carton may appear cheaper at first, but the extra space can require more board, larger inserts or larger shipping cases.
A custom size should not be viewed as a decorative upgrade. It is a structural decision that may affect the full packaging system.
Selective Spot UV
Spot UV creates glossy contrast on selected parts of the design.
It works best on a logo, product name, pattern or small graphic detail. The effect depends on contrast, so applying it to the entire carton can reduce its impact.
I often prefer one precise spot UV element over several finishes applied without a clear hierarchy.
It adds a premium detail while keeping the rest of the design controlled.
Custom Interior Printing
Interior printing is worth paying for when the inside panel communicates something useful.
It may include:
I would not add interior printing automatically.
The right question is whether the customer will notice and value it. If the inside is seen for only a moment and has nothing useful to say, the added expense may be better used elsewhere.
How to Reduce Tuck-Box Cost Without Making It Look Cheap
The best savings usually come from better planning rather than removing every visible feature.
To reduce cost intelligently:
Do not weaken the parts of the box that affect fit, strength and shelf presentation for a minor saving.
Start with waste. Look for excess size, unnecessary material, inefficient quantities and structural features that the product does not need.
The Two Biggest Quote-Comparison Mistakes
The two most common pricing mistakes are comparing different board thicknesses and ordering too few boxes without checking larger quantity levels.
Comparing Quotes With Different Board Thicknesses
A quote is not cheaper if it is based on a weaker or thinner material.
Two suppliers may both describe a carton as paperboard, but one may be quoting a lighter stock. The lower number can look attractive until the finished box bends, bulges or loses shape.
Before comparing prices, make sure every quote includes the same:
Shipping should also be checked carefully. Custom Packly provides free shipping for US orders, so there is no separate shipping charge to add after the box price has been reviewed.
Ordering Too Few Boxes
A smaller order reduces the initial total, but it can sharply increase the cost per unit.
Before approving 300 or 500 boxes, compare prices at:
The next quantity level may reveal a much stronger cost point.
That does not mean a company should order 10,000 cartons for an untested product. It means the decision should be based on the complete pricing curve rather than the first quantity requested.
For a stable repeat product, frequent small orders can cost much more than a planned bulk order or scheduled release.
What Information Is Needed for an Accurate Quote?
A reliable custom tuck-box quote requires more than a product name or reference photograph.
Prepare the following details:
If you are unsure about the structure, send the product dimensions, weight and intended use.
That is enough to begin comparing reverse tuck, straight tuck, snap-lock and auto-bottom options.
You can request a custom packaging quote with finished artwork, an existing dieline, a reference image or an early packaging concept.
Are Custom Tuck Boxes Worth the Cost?
Custom tuck boxes are worth the cost when they improve product fit, retail presentation, packing efficiency or brand recognition.
They are particularly effective for lightweight and medium-weight products that need printable retail packaging without the weight and construction of a rigid box.
Common uses include:
A tuck box may not be the right choice for a very heavy product or an item that needs corrugated shipping protection.
The right decision depends on what the carton must do.
A reverse tuck end box may be ideal when the main goal is economical retail packaging. A straight tuck end may be worth more when the front panel must remain clean. A crash-lock base may cost more to manufacture but save time during fulfillment.
Packaging should be judged by total performance rather than the unit price alone.
Frequently Asked Questions About Custom Tuck-Box Costs
What is the cheapest type of custom tuck box?
A reverse tuck end box is often one of the most economical choices for lightweight products. Its alternating closure flaps can support efficient sheet nesting and it normally requires only a standard glued side seam.
The final price will still depend on size, material, printing and quantity.
How much do 1,000 custom tuck boxes cost?
A useful estimated range is about $450 to $1,350 for 1,000 boxes.
A small carton with standard outside printing may sit toward the lower end. A larger box with thicker board, interior printing or specialty finishes may cost more.
Is a straight tuck end box more expensive than a reverse tuck end box?
A straight tuck end box may cost slightly more depending on the dimensions and sheet layout.
It is often selected because it provides a cleaner front display panel, which can be valuable for cosmetics, skincare and other products with important front-facing artwork.
Are auto-bottom boxes worth the higher price?
Auto-bottom boxes can be worth the added cost when the product is heavier or when packing speed matters.
The pre-glued base increases manufacturing cost, but it can reduce the labor needed to erect each carton. For high-volume packing, the time saving may offset the higher box price.
How can I get the lowest price without reducing quality?
Start by correcting the dimensions and comparing larger order quantities.
Then choose a suitable structure, match the board thickness to the product and use premium finishes only where they create clear visual value.
Removing wasted size and inefficient production choices is usually better than weakening the board.
Get a Tuck-Box Quote Based on the Actual Product
The most accurate tuck-box price starts with the product, not a generic box size.
Confirm the dimensions, weight, quantity and packing process first. Then choose the board, structure, printing and finishes that support those requirements.
Do not pay for unused space, excessive material or decorative processes with no clear purpose. At the same time, do not weaken the carton to save a few cents.
Send your specifications to Custom Packly for help comparing sizes, structures and quantities. Free design support is available from dieline preparation to a 3D mockup, with a minimum order starting from 100 boxes for US orders.
Current US standard turnaround is 4–6 days after final artwork and specifications are approved. Complex structures, specialty materials and advanced finishes may need additional time.